S.T.A.L.K.E.R. 2: Heart of Chornobyl Weaponry: A Comprehensive Guide
Navigating the treacherous Chernobyl Exclusion Zone in S.T.A.L.K.E.R. 2 requires a robust arsenal. This guide details the diverse weaponry available, their characteristics, and optimal usage within the game's post-apocalyptic setting. From classic firearms to experimental designs, choosing the right weapon is crucial for survival.
Weaponry Overview
S.T.A.L.K.E.R. 2 boasts a highly customizable weapon system. Players can modify and upgrade their firearms to match their preferred combat style. The arsenal includes traditional weapons like assault rifles and sniper rifles, alongside experimental models developed in clandestine military facilities. Each weapon possesses unique attributes – accuracy, damage, reload speed, range – influencing its effectiveness. Ammunition selection and weapon customization are key gameplay elements.
Weapon Statistics & Acquisition
The following table details each weapon, its stats (Damage, Penetration, Rate of Fire, Range, Accuracy), and potential acquisition methods. Note that these stats are relative and may vary slightly depending on modifications.
| Weapon Name | Image | Damage | Penetration | Rate of Fire | Range | Accuracy | Acquisition Method |
|---|---|---|---|---|---|---|---|
| AKM-74S |  |
1.2 | 1.1 | 4.9 | 1.9 | 2.7 | Human enemy drops, rarer early game, more common near Sphere with ISPF (ISZF) guards |
| AKM-74U |  |
1.0 | 1.1 | 4.92 | 1.2 | 2.5 | Enemy drops, trader purchases |
| APSB |  |
1.1 | 3.0 | 4.93 | 1.0 | 3.1 | Trader purchases |
| AR416 |  |
0.85 | 1.1 | 4.97 | 1.9 | 3.6 | Enemy drops, "Answers Come at a Price" quest |
| AS Lavina |  |
1.1 | 2.6 | 4.92 | 1.4 | 3.65 | Difficult locations, trader purchases |
| Beast |  |
1.1 | 2.8 | 4.9 | 1.9 | 3.0 | S.T.A.L.K.E.R. 2: Heart of Chornobyl specific, late-game |
| Boomstick |  |
5.0 | 1.1 | 4.9 | 0.55 | 1.7 | Various |
| Buket S-2 |  |
1.2 | 2.1 | 4.9 | 1.3 | 3.3 | Enemy drops |
| Clusterfuck |  |
1.6 | 2.1 | 4.95 | 2.4 | 4.0 | "Three Captains" quest |
| Combatant |  |
1.2 | 1.1 | 4.9 | 1.9 | 2.6 | Colonel Korshunov |
| Deadeye |  |
1.3 | 1.1 | 4.98 | 0.7 | 3.9 | "Ad astra per aspera" mission completion |
| Decider |  |
1.1 | 2.1 | 4.95 | 1.9 | 3.0 | "Unexpected Guests" side quest |
| Dnipro |  |
1.2 | 3.0 | 4.91 | 1.9 | 3.0 | Yantsevo station purchase/crafting |
| Drowned |  |
1.4 | 1.1 | 4.9 | 1.9 | 2.6 | Swamp mission from Buo |
| EM-1 |  |
5.0 | 4.0 | 0 | 5.0 | 5.0 | "Let No One Leave Unsatisfied" or "The Last Step" missions |
| Encourage |  |
1.4 | 3.0 | 4.9 | 1.0 | 4.0 | Killing Colonel Korshunov during "Down Below" |
| F-1 Grenade | 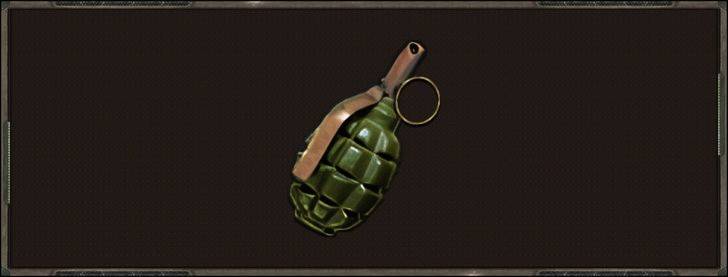 |
N/A | N/A | N/A | N/A | N/A | Loot or trader purchase |
| Fora-221 |  |
0.9 | 2.1 | 4.98 | 1.9 | 3.0 | Human enemy drops, Ward soldiers |
| Gambit |  |
1.2 | 1.1 | 4.95 | 0.6 | 3.9 | "The Forge of Progress" mission |
| Gangster |  |
0.5 | 2.1 | 5.0 | 0.7 | 2.1 | "A Minor Incident" mission |
| Gauss Gun |  |
5.0 | 4.0 | 0 | 5.0 | 5.0 | Side quests, Monolith soldiers |
| Glutton |  |
1.1 | 2.5 | 4.9 | 1.9 | 2.5 | Rostok region |
| GP37 |  |
0.8 | 2.1 | 4.96 | 2.3 | 4.3 | Locked room in Old Church, Eugene's Rostok base |
| Grom S-14 |  |
0.9 | 2.4 | 4.93 | 1.6 | 3.5 | Various |
| Grom S-15 |  |
0.9 | 2.4 | 4.9 | 1.6 | 3.8 | North of Burning Fire Depot, Cooling Towers |
| Integral-A |  |
0.7 | 2.9 | 5.0 | 1.6 | 3.9 | Eugene (Rostok), Vrek (Yanchev) |
| Kharod |  |
0.9 | 3.0 | 4.93 | 2.3 | 4.2 | Various |
| Labyrinth IV |  |
1.5 | 2.1 | 4.9 | 0.6 | 3.2 | Doctor's secret room (Kaimanov ending) |
| Lynx |  |
3.5 | 3.0 | 4.9 | 1.9 | 5.0 | Various |
| RPG-7U | 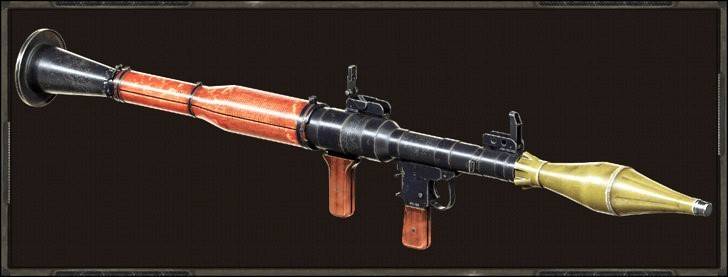 |
0.5 | 1.1 | 3.0 | 5.0 | 3.45 | "Clear Sky" base (Swamps) |
| Zubr-19 | 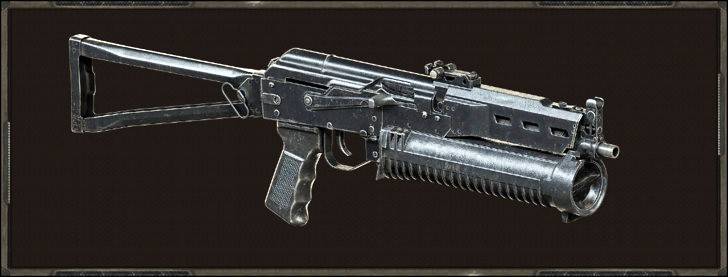 |
1.1 | 2.8 | 4.91 | 1.6 | 3.65 | Building in Lisov, Yanov region |
Remember that weapon effectiveness depends heavily on player skill and situational awareness. Experimentation is key to finding your preferred loadout for conquering the Zone.